Quantcast
Channel: Homebrew Archives - Wololo.net
Viewing all 1422 articles
Browse latest View live

Adrenaline Bubbles Manager v3.05 ready for Adrenaline v6 and Lman’s new adrbubblebooter version!

$
0
0

Adrenaline and adrbubblebooter plugin got updated, so Adrenaline Bubbles Manager v3.05 is here!

Recently we got another dose of Adrenaline by Theflow as a vpk injection, details here.

Not that much later, Lman released the new version of his great adrbubblebooter plugin, details here (both posts by Aurora).

So, it was time for Onelua Team to work on Adrenaline Bubbles Manager v3.05 (ABM)!

For this new version Gdljjrod added more versatility to ABM, cause besides creating PSPEMUXXX.vpk files and installing them (all done within the vita!) if you like Adrenaline v5 better, you don’t have to look for an special version to suit your needs 🙂 .

For those wondering, what the heck is BaltazaR4 talking about? let me tell you, ABM 3.05 can find out the installed Adrenaline version on your vita and give you the right options for that version.

So, if you have Adrenaline v5 and don’t want to move on to Adrenaline v6, ABM will still work for you, and if you didn’t wait and updated to Adrenaline v6, guess what? you can use this version of ABM too no problem!.

This time, thanks to Gdljjrod, we can enjoy an ABM update which works with both Adrenaline setups.

Now let me tell you about ABM controls for Adrenaline v6 setup:

  1. X to select the iso/cso/hb to be launched with the bubble to be created.
  2. O to edit the boot.inf file or to go back to previous window.
  3. /\ to show selected content pic1 on the background.
  4. START to go back to livearea.

ABM will get the icon0.png and pic1.png from the iso/cso/hb to set as bubble and startup icons and pics, otherwise all the pspemuxxx bubbles will have Lman’s black icons and pics.

Now you can give your bubble a name and you can setup the driver and loader as follows:

  1. Press  X  for Inferno driver       or  /\ for March33 driver       or  O for NP9660 driver
  2. Press  X  for eboot.bin                or  /\  for eboot.old                  or  O  for boot.bin

After choosing the desired driver and loader the ps vita will restart to load the images taken from the iso/cso/hb.

There is only one issue at this moment with ABM, after a db rebuild/update the images from the iso/cso/hb will be gone, but thats why there is a new option included.

ABM’s Bubble’s icons restore option added!

Yes, to compensate the issue mentioned above, the option to restore icons and pics from is0/cso/hb inserted on the bubble was added.

To use this feature you have to go to the Edit Boot.inf with O and a list of installed pspemuxxx bubbles will be displayed and then on that list get the cursor over the bubble to be restored and press X.

After that all you have to do is follow the instructions and the icons/pics from the iso/cso/hb will be back without having to do the whole process again!

But fear not! 😀 Onelua Team is working on some cool trick to avoid losing the icons/pics changes with the db update/rebuild, so, stay tuned.

If you don’t have any version of ABM installed (I’m wondering why? :P) you can grab it here!

And if you already have it installed and want to have this new version just in case you want to update to Adrenaline v6 then you can use the online updater!

Credits go to:

  1. Team molecule
  2. Theflow for Adrenaline eCFW
  3. Lman for adrbubblebooter plugin
  4. Onelua Team for Adrenaline Bubbles Manager

The post Adrenaline Bubbles Manager v3.05 ready for Adrenaline v6 and Lman’s new adrbubblebooter version! appeared first on Wololo.net.


VitaShell v1.70 – Major Update Released!

$
0
0

TheFloW is back yet again with another update for the most widely used homebrew in the VITA scene, VitaShell. This is a major update, and adds more welcomed features and bug fixes to enhance overall application quality.


What’s VitaShell?

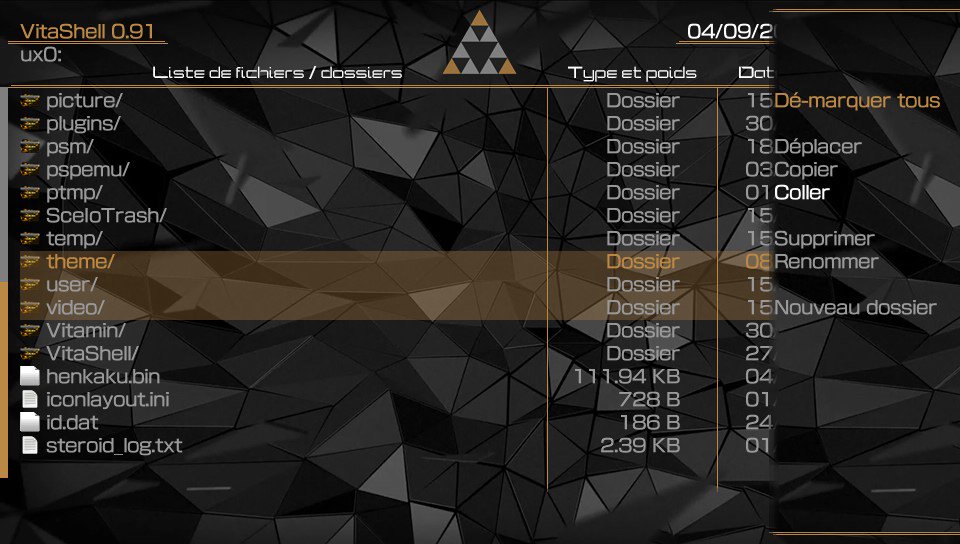
VitaShell is a multi-purpose file manager that provides a GUI for file management. Being one of the most widely used homebrews in the scene, it allows you to do various things such as installing vpk applications, transferring files via FTP or USB, open a plethora of media files, and view/edit text among other major things such as mounting hard drives/flash drives as a storage device for PS TV/VITA TV.


VitaShell 0.91 Deus Ex theme by @TheDragoon1010


Change-log:

  • Added QR Code scanner and file downloader by cxziaho (press L+R to open the camera).
  • Added option in ‘More->’ to open applications in decrypted mode (bypass PFS). Thanks to frangarcj.
  • Added ability to mount sd2vita and psvsd as USB device.
  • Fixed bug where ‘imc0:’ could not be mounted if the Memory Card was not available.
  • Fixed bug where accessing the settings menu crashed if there was no Memory Card available.
  • Fixed bug where automatic USB connection was not blocked, after leaving and resuming VitaShell. PS TV will now always open FTP when pressing SELECT.


With this update, installing VPKs has been easier than ever before. All you need to do is Press L + R, point your camera towards a QR Code (as long as the URL ends in .vpk format), and sit back and let the installation take place. Now you also have the option to mount sd2vita and psvsd as a USB device. This is incredibly handy considering how ridiculously expensive those memory cards are.

In previous releases, imc0: could not be mounted without a memory card inserted. While it would be still be accessible via PC, it was unable to mounted on VitaShell. This is no longer an issue and has been fixed. There are also other features/bug fixes which make the app feel a lot more stable than it ever was.


Download:

PS, if you have an internet connection, you can update straight through VitaShell itself. If not, you can download it via the GitHub link below.

https://github.com/TheOfficialFloW/VitaShell/releases

The post VitaShell v1.70 – Major Update Released! appeared first on Wololo.net.

Tutorial: How to use VitaShell’s new QR code reader to download files easily onto your Vita!

$
0
0

VitaShell 1.7 landed a short while ago and it has a peculiar new feature. That is the ability to read QR codes; this feature was created by “cxziaho” and got integrated into TheFlow’s infamous VitaShell earlier today.


What’s a QR code? How do I use this to make downloading files easier?

For those who don’t know, a QR code is an image with a particular dot arrangement which when read by a QR code reader reveals a string of text. In most cases, this leads to some web address which means that downloading can be made even easier on the Vita. This is mostly because the Vita doesn’t have a copy/paste function and the browser, while not bad, sometimes doesn’t work well enough when trying to access some websites. Thanks to this new feature, you can easily copy direct download links to your Vita! To use this feature, you need to do the following:

  1. Find the direct download link of what you wish to download. This usually ends with the file extension of the file you’re going to download (.zip is a common format for compressed files)
  2. Go to a QR code generation website on your device (you may use any device including smartphones). The first website that popped up from a Google search is (Wololo is in no way affiliated with this website): http://qr-code-generator.com

    Creating a QR code on an iPad for the Touhou game for PSP. QR codes can be copied directly off the iPad’s screen

  3. Open VitaShell on your PSVita and hold the left and right trigger till a box outputting your rear camera’s image comes up.
  4. Point the rear camera at the QR code and your Vita will ask you whether you wish to open the link. If you choose to open it, the URL will be opened in the browser and you can download the file.
  5. You’re finished! Now, you can find your files in ux0:/download/.

As you can see, with this method you avoid having to copy files over to your Vita via FTP or USB which makes life much easier especially if you’re not next to a computer. The QR Code reader opens the browser so you need to have Download Enabler (by TheFlow) to download files to your Vita.

Conclusion

To download VitaShell 1.7, you don’t need to do anything in most cases thanks to VitaShell’s update feature. Due to this, VitaShell will prompt you to upgrade to version 1.7 if you’re on an older release. Enjoy messing around with QR codes and hopefully VitaShell gets the ability to extract 7z and RAR files soon so that all downloads can be easily opened. If you have any issues, report them in a civil way to “TheFlow” on GitHub!

VitaShell 1.7 changelog + download link: https://github.com/TheOfficialFloW/VitaShell/releases/tag/1.7

Download Enabler 0.3 (latest release): https://github.com/TheOfficialFloW/DownloadEnabler/releases/tag/v3.0

The post Tutorial: How to use VitaShell’s new QR code reader to download files easily onto your Vita! appeared first on Wololo.net.

QR codes added to VitaDB – Easily install homebrew by just scanning QR codes!

$
0
0

VitaShell, TheFlow’s famous homebrew that’s installed on almost every HENkaku-enabled device, got QR scanning functionality with version 1.7 and obviously, it’s already been put to good use. Rinnegatamante, the guy who’s given several great contributions to the scene (such as Lua Player Plus, VitaDB and other homebrew/plugins), decided to add QR codes to every homebrew and plugin that’s hosted on VitaDB.

VitaDB QR

QR code for mGBA on VitaDB


What exactly are QR codes? How can I benefit from their addition to VitaDB?

QR codes are images with a particular dot pattern whose purpose is to deliver a string of text when read by a QR code scanner. The string of text usually leads to a web address which means that QR codes can have a variety of purposes. On VitaDB, you can now easily download and install any homebrew by just scanning the QR code with VitaShell 1.7 (or newer). To get a homebrew through the QR scanner, you need to do the following:

  • Go to VitaDB on your computer/smartphone/tablet.

    Scanning the QR code via VitaShell

  • Select the homebrew you wish to install and press on the “Get QR Code (VPK)” button.
  • You’ll get a QR code that you’ll have to scan with your Vita on your screen.
  • To scan the QR code, open up VitaShell (must be version 1.7+ so MolecularShell won’t work as that’s based on VitaShell 1.43), hold the L and R trigger simultaneously and point the Vita’s rear camera at the QR code.
  • The PSVita will scan it, tell you the name of the VPK and ask whether you want to install it.
  • After choosing “yes” (as per the screenshot), the VPK will automatically install!

    Installing a VPK after scanning a QR code. mGBA in this case

The ability to install VPKs directly from VitaDB by just scanning a QR code can be useful in a variety of situations like when you want to install VHBB the first time or if you prefer to browse VitaDB on your smartdevice/PC. QR code scanning can also be used as a fallback method if VHBB doesn’t work for some reason.

You can also download plugins from VitaDB in ZIP, SUPRX or SKPRX format (different plugins are in different formats) but they won’t be directly installed so you have to do changes to taiHEN’s config.txt yourself. Downloaded plugins are saved to ux0:download/.

Conclusion

In order to use this feature of VitaDB, you need, as stressed before, VitaShell 1.7 or newer. Currently, VitaShell is going through a phase of rapid releases to fix bugs with 1.7 (1.74 is the latest) so this functionality may be broken in a future release but don’t worry as it’ll probably be quickly fixed by a newer release. If you have any issues with the QR codes on VitaDB (incorrect links etc), report them to Rinnegatamante on Twitter. Issues about the QR reader itself should go to TheFlow on GitHub. Credit for the QR reader itself goes to “cxziaho”; for VitaShell to “TheFlow”; and for VitaDB to “Rinnegatamante”.

VitaDB: https://vitadb.rinnegatamante.it/

Rinnegatamante’s Twitter (for reporting issues and updates about his homebrew/plugins/VitaDB): https://twitter.com/Rinnegatamante

The post QR codes added to VitaDB – Easily install homebrew by just scanning QR codes! appeared first on Wololo.net.

libnx released, library to write Nintendo Switch homebrew

$
0
0

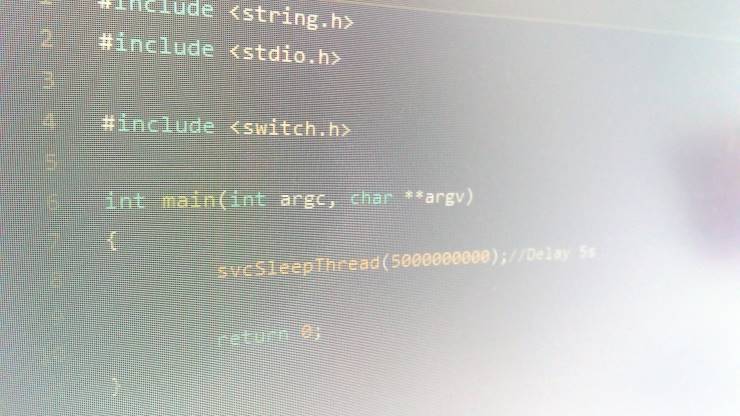
Switch hackers Yellows8 and Plutoo have released libnx, a C library to write usermode homebrew for the Nintendo Switch.

Of course, writing and running Nintendo Switch Homebrew will require access to a native Nintendo Switch exploit, which does not publicly exist yet. Pegaswitch is “only” a Webkit entry point which does not give native access to homebrew at the moment.

However, Multiple hackers have confirmed that Nintendo Switch on firmware 3.0.0 and below are vulnerable to smhax. Smhax is an undisclosed native exploit for the Switch, but some people are assuming that the release of libnx implies smhax, or some other native exploit, will be released soon.

Libnx is based on libctru, the library for native 3DS homebrews.

For now, libnx looks extremely barebones. In particular there are no meaningful homebrew samples included yet, although I assume these will come soon if an exploit is released and the scene gets excited about Switch homebrew.

The first libnx sample is… simple

Download and install libnx for Nintendo Switch

You can download libnx from the project’s github here. Make/Use instructions are in the Readme.

Source: Yellows8

The post libnx released, library to write Nintendo Switch homebrew appeared first on Wololo.net.

NoNpDrm version 1.1 released and VitaShell updated to 1.74 – Important bug fixes for the Vita/PSTV

$
0
0

TheFlow is known for releasing a lot of awesome software, such as Adrenaline, for the PSVita but with all software, there are some bugs and issues that need to be sorted out. Thanks to update 1.1 to NoNpDrm and VitaShell 1.74, more bugs got squashed so that everybody could get a more pleasant experience on their HENkaku-enabled devices.


What’s NoNpDrm and what got updated in version 1.1?

In a nutshell, NoNpDrm is a plugin that disables all forms on DRM protection on PSVita games (PSX and PSP games in PKG format don’t work but you should be using Adrenaline to play those titles anyway). In practice, NoNpDrm is mostly used for making ‘backups’ for both legal and illegal purposes (piracy shall not be discussed on Wololo or its /talk forums!). Now, NoNpDrm got updated to version 1.1 and the following got updated:

  1. A bug was fixed in which fake license files of addcont on grw0: were not being created.

It is recommended you get this update if you use NoNpDrm so that you avoid any issues that could crop up when using this plugin. To get it, just follow the link below, download the skprx file, replace the old skprx file (of NoNpDrm 1.0) and reboot your device.

What’s VitaShell and what got updated in version 1.74?

VitaShell, the ultimate file manager for the PSVita with a lot of useful features, doesn’t really need an introduction. Apart from managing your filesystem, it could be used for FTP/USB file transfer, installing VPKs and a lot of other things such as QR code reading which was introduced in version 1.71. From version 1.71 to 1.74, the following got fixed:

  • 1.71: PSVSD USB device mounting got fixed.
  • 1.71: Fixed a bug in which the QR reader result got outputted twice.
  • 1.71: A bug was fixed in which uma0: options were not greyed out on devices other than the PSTV.
  • 1.72: Files from HTTPS links scanned by QR codes can be downloaded.
  • 1.72: PSVSD and PFS mounting bugs got fixed
  • 1.73: The crash when you pressed triangle in the home menu got sorted out.
  • 1.74: QR download and the C2-13696-5 error got fixed.

    VitaShell 1.74 in action

  • 1.75/next update: The QR reader functionality gets fixed again since on 1.74, you’re no longer able to open scanned URLs directly in the browser. VPK installations from a QR code still work however. Other bug fixes.

It is recommended you get VitaShell 1.74 for a better experience (unless you need the ability to copy URLs from QR codes to the browser). You should be notified of the update if you’re connected to WiFi when you open VitaShell. You may also get VitaShell 1.74 via VitaDB, VHBB (uses VHBB) or by directly installing the VPK from the link below.

Conclusion

As these are both pieces of software that have to do with important system functionality, make sure that they are from TRUSTED sources. If you have any issues, report them to ‘TheFlow’ on GitHub in a civil and well though out manner! Make sure that you do not open new issues (i.e bug reports) on GitHub before checking if any similar issues had already been closed/fixed.

NoNpDrm 1.1(more info + download link): https://github.com/TheOfficialFloW/NoNpDrm/releases/tag/v1.1

VitaShell 1.74 (more info + download link): https://github.com/TheOfficialFloW/VitaShell/releases/tag/1.74

The post NoNpDrm version 1.1 released and VitaShell updated to 1.74 – Important bug fixes for the Vita/PSTV appeared first on Wololo.net.

Rinnegatamante shows off video playback with Lua Player Plus on the Vita – Better video player coming soon?

$
0
0

Rinnegatamante has given various contributions to the PSVita scene and he even ported over Lua Player Plus to the PSVita with the help of some other developers. Lua Player Plus is a powerful Lua interpreter with various features, including the ability to output 3D graphics via the GPU, and now it’s going to get video playback functionality too.


What exactly is Lua Player Plus and why is the ability to play back video important?

Lua Player Plus is a Lua interpreter for the PSVita with various features such as:

  • Support for 2D/3D rendering via the GPU; this makes LPP the easiest way to code a homebrew containing 3D graphics for the Vita.
  • The ability to play back sound in various formats.
  • A built-in FTP server for debugging.
  • Support for various picture formats.
  • Many other features such as a built-in rescaler to make porting homebrew written with LPP for the 3DS to the Vita much easier. Vita Hangman is an example of an LPP game for the 3DS being ported to the Vita.

Lua Player Plus

Thanks to Lua Player Plus, we were able to get various great pieces of software such as Pro Camera Vita (an app by VitaHEX that’s much better than the official Camera app for the Vita), EUCLOID and Flappy Bird among others.

With the ability to play videos, a homebrew that a good number of us desire may become possible. The stock video player isn’t great as you have to either import your files via QCMA or MediaImporter (a homebrew utility) which both make the process longer than it needs to be. A media player (like VLC which plays back both videos, audio and has various other abilities) written in Lua could make the PSVita a great console for watching series on the go especially with the SD2Vita which can take cards up to 200GB. A great video player would also be useful on the PSTV as it could make for a great Android box replacement as you could connect big pen drives/external hard drives to it to store and watch your favourite shows/movies.

Possible developers that may create a better media player for the Vita are Rinnegatamante and VitaHEX, who’s developed quite a few useful utilities, such as Notepad Vita, with LPP.

The video codec used will be H264 (one of the most common video codecs) and Vorbis will be the audio codec although this may change.

Conclusion

Video playback functionality isn’t completely ready just yet so that means that you’ll have to wait a bit till you actually see a better media player for the PSVita. That being said, someone will probably step up to the plate and make us a more useable media player, even if it only lets you to directly watch videos rather than have to import them manually. Other than a media player, the ability to play back video could be used to make better cutscenes in homebrew games.

Source: https://twitter.com/Rinnegatamante/status/912063688835784704

Audio/Video codec information: https://twitter.com/Rinnegatamante/status/912063688835784704

The post Rinnegatamante shows off video playback with Lua Player Plus on the Vita – Better video player coming soon? appeared first on Wololo.net.

You can now customize your (hacked) PS Vita’s fonts, but is it worth the risk?

$
0
0

Reddit user cxziaho recently revealed a technique to update the fonts on your PS Vita. This is something that lots of people have been wanting to do for a while, and the technique seems pretty straightforward. Long story short, the PS Vita is compatible with the OpenType Font format (.otf) (as well as, apparently, TrueType Font – ttf), and the font files on the psvita are just otf/ttf files renamed into .pvf.

Installing your own custom fonts mostly consists in renaming the .otf font of your choice into a .pvf file in the right folder on the psvita.

It sounds easy enough, but is not without risks, and for now there is no automated tool that lets you do it without any problem. At least one user has reported a brick since the method was unveiled a few days ago:


I for now would not recommend to give this a try, until more information is provided as to what fonts are compatible or not, and tools with the right levels of verification are put into place.

With that being said, this looks like awesome progress for those willing to create custom themes for their ps vita, and we can probably expect the usual theme tools to get updates in order to support this soon.

The full method from cxziaho (source):

Custom Fonts

The ‘.pvf’ fonts used by the PS Vita are just renamed ‘.otf’ files (same magic in the header, which is OTTO). This means you can replace the built in fonts with custom .otf fonts.

Doing this with the wrong font doesn’t brick your Vita (in fact the Vita can boot without sa0: mounted at all), but it can cause a few problems.

1) Download any ‘.otf’ font.
2) Rename your font to ltn0.pvf
3) Install the plugin unmount
4) Restart your Vita
5) Open FTP and drag ltn0.pvf from sa0:data/font/pvf/ into a save place.
6) Drag you new ltn0.pvf intosa0:data/font/pvf/
7) Disable the unmount plugin and restart.

Now you should have a custom font!
Because this is kinda dangerous, I will be trying to create an easier installer for this (not sure if I’ll be able to tho because sa0 has to be remounted on startup for RW).

Images with the font Comic Jens
Make sure you back up your fonts in sa0, and be careful while you install the font.
Also, if you brick or something don’t blame it on me lol

Hackinformer also have a detailed tutorial here.

Cxziaho has stated on twitter that he will work on a manager to set the fonts:

Source: Reddit, thanks to @NoOne_PK

The post You can now customize your (hacked) PS Vita’s fonts, but is it worth the risk? appeared first on Wololo.net.


PSVTools released – Easily manipulate PSV files with Python!

$
0
0

Earlier this month, developer motoharu, the guy that did SD2Vita software patches, released Virtual Game Card which is a tool that lets you properly dump your Vita games. The files produced have, a somewhat fitting, “.psv” file extension and can be likened to ISO files of a CD/DVD as they’re NOT compressed out of the box. Thanks to some scene developers, the “.psv” format is becoming much better.


What’s PSVTools?

PSVTools is a python utility that combines three important PSV file utilities. These 3 utilities are:

  • PSVTrim, a utility to trim PSV files which doesn’t seem to share code with PSVTrimmer so that means that it could be used as an alternative. PSVTrimmer requires .NET framework so it can only run reliably on Windows while PSVTrim can run on Linux/MacOS or any other system that has a port of python 2.7/3.4+
  • PSVExpand, a utility to expand trimmed PSV files to their original size.
  • PSVerify, a utility that validates checksums of PSV files.

Virtual Game Card – A dumper/mounter for Vita card dumps in PSV format

These 3 tools are quite important if you wish to have proper 1:1 backups of your games. This is a good idea since no data is altered in the process which means that the dumps could be used reliably thus totally negating the need of needing to carry about your Vita game carts. With SD2Vita, it’s not recommended you take it out of the slot too much so the PSV file format is probably the best way to go when archiving your game so you could install it at a later date whenever you wish.


Conclusion

If you use Linux/MacOS and want to dump your game carts, this is the best tool there’s available for these platforms. Obviously, you need Python 2.7 or 3.4+ for this to work so make sure it’s installed. Installation instructions and the source code can be checked out by following the link below. If you have any issues, report them to ‘kageurufu’ on GitHub.

Installation instructions + initial release notes: https://github.com/kageurufu/psvtools/releases/tag/0.1.0

Reddit link: https://www.reddit.com/r/vitahacks/comments/72gtbw/release_psvtools_python_psv_format_manipulator/

The post PSVTools released – Easily manipulate PSV files with Python! appeared first on Wololo.net.

fontRedirect plugin released – Change your Vita’s fonts without the added risk!

$
0
0

Earlier this week, cxziaho shared a method on how to change the Vita’s fonts with us all. While customisation is great, the method was pretty unsafe since it made you have to replace a file in sa0 which could even hinder your ability to restore the firmware if you install a wrong font. Now, thanks to his efforts fontRedirect is out so you could change your Vita’s font in a safe way!

fontRedirect plugin

Changing the fonts on the Vita – the safe way!


What’s fontRedirect?

fontRedirect is a plugin that lets you change your Vita/PSTV’s font without the added risk of the method previously shared on this website. The plugin works by injecting a different path into SceLibPvf which means that when you start your Vita without plugins (holding the L trigger on boot up if you’re using HENkaku Ensō), the original font will be used as no system files get modified. This means that you will not be bricking your PSVita if you install an incorrect font so you can experiment all you want!

While the plugin works with system applications and homebrew, I’ve found out that most PSVita games just crash after a small while. There’s also an issue with VitaShell in which it’ll lock up your device (only locking the device by pressing the power button works) when you try to create a new folder.

The plugin actually works well in non-game PSVita applications

How do I install this plugin?

Installing the plugin and changing your font is pretty easy:

  • Download the plugin from the link below. You should also get a font file in the form of a TTF or OTF file.
  • Copy fontRedirect.suprx to ur0:tai or ux0:tai depending on which directory you use for your taiHEN config.txt file.
  • Copy the font over to ux0:/data/font AND rename it to “font.otf” (without the quotes). The file extension must still be OTF EVEN IF the font file is a TTF file.
  • Insert fontRedirect.suprx as the first entry under *main in your taiHEN config.txt.
  • Reboot your PSVita/PSTV and enjoy!
  • If you have any issues, just hold the left trigger while booting and all plugins will be bypassed.

Conclusion

While this plugin is pretty cool, it is pretty rough around the edges and the fact that games don’t work with it is kind of a deal breaker. I tried 5 different PSVita games, none of which worked which means the plugin is little more than a novelty unless you plan to only use homebrew/system and PSN applications/PSP games. Hopefully, this will be fixed soon enough by ‘cxziaho’ who nontheless, still did a good job with this plugin with some help from Rinnegatamante, Xerpi and devnoname120.

Unfortunately, you’ll be seeing a lot of this in your Vita games

fontRedirect download link: https://github.com/cxziaho/fontRedirect/releases/tag/1.0

More information about the plugin: https://github.com/cxziaho/fontRedirect/blob/master/README.md


I’m aware there’s a GUI application for fontRedirect called fontInstaller but it crashed on me no matter what I tried so I’ll delay an aritcle on that until I can actually get it to work!

Note: The font used in the images is called Sofia and was downloaded from fontsquirrel.com.

The post fontRedirect plugin released – Change your Vita’s fonts without the added risk! appeared first on Wololo.net.
Zombiebound for the PSVita released – Pop off zombie’s head on your Vita!

$
0
0

Homebrew games on the PSVita have been popping up since HENkaku was released but 3D ones have been far and few between. Now, thanks to VitaHEX, we got Zombiebound, the second LPP game that uses 3D graphics and this one is a first-person zombie shooter.


What’s Zombiebound?

As the title suggests, Zombiebound is an original homebrew zombie-shooting game for the PSVita. The game is a first-person zombie shooter with pretty decent 3D graphics which is a genre you may already be familiar with if you played games like Call of Duty: Zombies or on COD4 servers with the Reign of the Undead mod (one of the best ways to enjoy multiplayer zombie shooting in my opinion). The game has various things to offer such as:

  • Decent 3D graphics that have been hand-drawn by the author of the homebrew.
  • Endless waves of zombies with increasing difficulty so that you could play the game for quite a while without getting bored.
  • The ability to choose between 3 different weapons, namely a pistol, shotgun and assault rifle.
  • A buttery smooth framerate at the Vita’s native resolution which makes the game experience quite fun.
  • The ability to purchase the aforementioned weapons from walls by using in-game credits you get from killing zombies.
  • The ability to build barricades (a la ROTU for COD4) to prevent zombies from swarming in on you.

    Playing Zombiebound on the PSVita

In my opinion, the game is quite a feat as it is able to deliver appealing visuals combined with a smooth framerate at the Vita’s native resolution (960×544) so VitaHEX should really get a round of applause for his great work. Like all of VitaHEX’s work, this homebrew game is written in Lua Player Plus, a powerful Lua interpreter that even lets you output 3D graphics accelerated by the GPU. Lua Player Plus was ported to the Vita by Rinnegatamante and has various other great features such as the ability to play back video which was introduced a few days ago.

How do I get it?

The game is available on VitaDB which means it’s also on Vita Homebrew Browser. That being said, I had some problems when I tried to install it. When I installed it via VHBB, it didn’t show up and VitaShell threw an error at me when I tried installing the VPK.

The control-scheme of Zombiebound.

It only worked after installing the VPK via MolecularShell and then rebooting but your mileage may vary. Remember, this is a 0.1.0 release so it’s no secret that there might be bugs. If you encounter any bugs, report them to VitaHEX (big_Sakis25) on the Wololo /talk forums thread linked below.

Hopefully, this homebrew game will continue being developed as it really looks like it’s going to be one of the best Vita homebrew games. VitaHEX has plans for future releases such as more levels, smarter zombie AI and better animations among others. Make sure you don’t bug VitaHEX for features and just wait patiently.

Wololo /talk forum thread (bug reports + more info): http://wololo.net/talk/viewtopic.php?f=116&t=48583

Download link: http://vitadb.rinnegatamante.it/#/info/328

Patreon page of VitaHEX (he really deserves a buck or two for his excellent work in my opinion): https://www.patreon.com/vitahex

Wololo isn’t affiliated with VitaHEX in anyway and won’t benefit from any donations you give to VitaHEX on Patreon.

The post Zombiebound for the PSVita released – Pop off zombie’s head on your Vita! appeared first on Wololo.net.

Native homebrew showcased on the PS4, minimal 2D library released

$
0
0

Last week, scene developer psxdev showcased what is probably the first public native PS4 homebrew. The homebrew is run by hijacking the launch process from an official game (free PS4 game playroom), using some work released last week by Zecoxao.

All of this, of course, requires a jailbroken PS4, which is only publicly possible on firmware 1.76 right now.

In addition to showing the homebrew, psxdev has released a minimalist library to create PS4 homebrew. The library is named liborbis, in reference to the development name of the PS4, which was codenamed Orbis.

The homebrew itself is quite simple, and just used as a demo to show 2D rendering and confirm that controller input is working.

At this point of course, what is really missing is an actual Jailbreak of more recent models. There were hopes last week of an upcoming exploit release on firmware 4.xx, for what just turned out  to be a hoax. Hacker SpecterDev also mentioned he has a PS4 Kernel exploit for firmware 4.0.5, but is not at liberty to release it as it’s not 100% his work.

The post Native homebrew showcased on the PS4, minimal 2D library released appeared first on Wololo.net.
VitaShell 1.75 released – QR code reader fixed

$
0
0

VitaShell, TheFlow famous homebrew that’s probably installed on every PSTV/Vita running HENkaku, is one of the greatest piece of homebrew for the Vita but as it has many features, bugs are bound to pop up. VitaShell 1.75 has been released to address some bugs, even one that was created in 1.74.

The auto-update feature really makes your life easier!


What’s VitaShell?

This homebrew utility really needs no introduction as it’s the first homebrew you probably got installed in your Vita in the form of Molecular Shell. VitaShell was developed by TheFlow with the help of some other developers who contributed to some features. It was originally released for Rejuvenate and was awarded the “best homebrew” prize in the Revitalize competition which took place in 2015.

Opening a URL from a QR code link

Some features of VitaShell are:

  • Ability to delete/move/copy/rename files and create folders.
  • Ability to start an FTP server to copy files over to your Vita and the ability to copy files to your Vita via USB from a computer.
  • The ability to play music, view images, read text documents and view SFO files.
  • A QR code reader that lets you install VPKs from the internet if the link leads to a VPK. VitaDB has QR code links for all homebrews and plugins hosted on it.
  • Many other features.

What got updated/changed in VitaShell 1.75?

In VitaShell 1.75, the following got changed/updated:

  • A bug was fixed in which the memory card got unmounted after closing a USB transfer session. This, in turn, fixes ‘The file is corrupt’ error.

    Downloading a file from a link from a QR code. You no longer need to have Download Enabler as it doesn’t open in the browser

  • The QR code reader got fixed for most URLs as VitaShell 1.74 broke QR code functionality for all QR code links except for a few such as those found on VitaDB. Now, you don’t need Download Enabler to download a file from a QR code link as the Browser isn’t opened for files that can be downloaded. If the link leads to a website, you will be asked whether you want to open it in the browser. Downloads from QR code links are put in ux0:download/.

As you can see, the update fixes some critical bugs in regards to QR code reader functionality. I suggest you update to this version as I haven’t noticed any issues with it and it properly fixes the QR code functionality which was mostly broken in version 1.74.

Conclusion

VitaShell will prompt you to update if you’re connected to WiFi so updating is pretty easy. If, for some reason, it doesn’t ask you to update to version 1.75 or you’re not/can’t connect to the internet, just download the VPK from the link below and install that from VitaShell. Make sure you get VitaShell from a trusted source since it requires unsafe permissions!

If you have any issues, report them in a civil way on GitHub and make sure you don’t report any issues that have already been reported/closed. Issues relating to the QR code reader should be directed towards ‘cxziaho’ as he is the one that created and maintains the QR code reader.

VitaShell 1.75 update (download link + more info): https://github.com/TheOfficialFloW/VitaShell/releases/tag/1.75

Guide on how to make use of the new QR code functionality: http://wololo.net/2017/09/20/qr-codes-added-vitadb-easily-install-homebrew-just-scanning-qr-codes/

The post VitaShell 1.75 released – QR code reader fixed appeared first on Wololo.net.

FakeCamera 1.1 for the PSTV released – Use a BMP as the camera image for games that need camera input on the PSTV!

$
0
0

For some reason, Sony doesn’t allow PSTV users to play some Vita games without any good reason but some games that aren’t allowed to start on the PSTV have a valid reason.. sort of. Thanks to developer “OperationNT414C” on GitHub, you could play games that need camera input (for little things) on your PSTV without any crashes!


What’s FakeCamera?

FakeCamera is a plugin for HENkaku-enabled PSTV devices that sends invalid camera calls when a game/homebrew asks for camera input. Due to Sony not wanting to take the extra time to properly code a fallback when a camera is not found, games may crash when they ask the player for camera input so this is where this plugin comes in handy. Thanks to this plugin, your game won’t crash as a tailored answer for the SceCamera API is sent! Some games that could be fixed up with this plugin are:

  • WipeOut 2048 – The game will no longer crash on multiplayer startup due to the useless camera feature.
  • Tearaway – Won’t crash when the user is asked for camera input
  • Virtua Tennis 4 – Works fine in ‘CAM VT’ mode with FakeCamera 1.1 and a fake BMP image.
  • Homebrew like VitaShell (QR function) and Pro Camera Vita also work properly as of FakeCamera 1.1 and a fake BMP image.
  • The mini-games “Hello Face” and “Snap + Slide” in Welcome Park work well with FakeCamera 1.1 and a fake BMP image.

    Tearaway – Now more playable thanks to DSMotion and FakeCamera

You still need AntiBlackList (by Rinnegatamante) to play games that Sony decided shouldn’t be run on the PSTV

What got changed/updated in FakeCamera 1.1?

The following got changed/updated in FakeCamera 1.1:

  • A version of FakeCamera with the ability to send BMP images of your choice got released. This means that you can directly interact with games that are satisfied with a still image. More instructions on how to use it can be found in the link below.
  • A minor fix in which some wrong resolution values were fixed was added.
  • The BMP version of the plugin (fakecamerabmp.suprx) requires you to also load dsmotion.skprx for it to work.

Version 1.1 of FakeCamera comes in 2 different versions, one that lets you send BMP files to the application (fakecamerabmp.suprx) and one that works like FakeCamera 1.0 and just fakes camera calls to avoid crashing (fakecamera.suprx).

Conclusion

Thanks to this plugin and DSMotion, which lets you use your DS3/DS4’s motion controls for motion input on the PSTV, you can properly play almost all PSVita titles on your PSTV. If you have any issues, report them to “OperationNT414C” on GitHub in a civil manner and before, you should check if the same issue has already been reported or closed.

FakeCamera 1.1 (download link + changelog): https://github.com/OperationNT414C/FakeCamera/releases/tag/1.1

FakeCamera Readme (contains detailed installation instructions): https://github.com/OperationNT414C/FakeCamera/blob/master/README.md

DSMotion (lets you use DS3/DS4 motion control values with games that need motion control on the PSTV): https://github.com/OperationNT414C/DSMotion

The post FakeCamera 1.1 for the PSTV released – Use a BMP as the camera image for games that need camera input on the PSTV! appeared first on Wololo.net.

Time Setting script lets you launch the NES golf game on your Nintendo Switch

$
0
0

The following is for hackable Nintendo Switch firmwares, namely 3.0.0 or lower.

Developer jam1garner has added a script to the Pegaswitch repository that lets you set the system time of your Nintendo Switch. The main use case for this is to be able to launch the easter egg golf game (“flog”), which can theoretically only be launched on July 11th.

Users of the script can now set their console’s system timer to July 11th, then follow the instructions to launch the hidden golf game. As mentioned above, this requires your console to be hackable, which can only be done with firmware 3.0.0 or lower at the moment.

Download

Since the dev’s announce, the script has been merged into the reswitched repository. You can get all the scripts there, then follow the readme to run scripts.

To run (courtesy of reddit):

  1. Host Pegaswitch with Node 2.
  2. Set Switch’s DNS to IP address of your PC
  3. connect, then run: evalfile ./usefulscripts/setRtc.js

Source: jam1garner, thanks to ross31192 for the tip!

The post Time Setting script lets you launch the NES golf game on your Nintendo Switch appeared first on Wololo.net.

Tetromino for the PSVita released – Play Tetris on your Vita with style!

$
0
0

The homebrew scene on the Vita has its own fair share of game ports and obviously, that means that we’re bound to have a Tetris port or two. Thanks to developer ‘svenn’ of Wololo /talk forums, we got Tetromino, which is a great Tetris clone.


What’s Tetromino?

As its title suggests, it’s a tetris clone for the PSVita that’s presented in a pretty decent way. The game is written in Lua and is interpreted through Rinnegatamante’s Lua Player Plus; it’s based on the code for Javascript Tetris. Tetromino has the following features:

  • Different coloured Tetris pieces that are placed on a grid so that you can easily tell where they’re going.
  • A decent interface that tells you your highscore, score, amount of lines you’ve cleared and the level (not sure what the developer means here).
  • Description of what the controls do (only START/SELECT till now) and a battery indicator. Hopefully, another panel will be added which tells you what the circle and cross buttons do.

    Playing Tetromino!

  • A box in which you can see which will be the next piece to fall.
  • Simple controls as you’d expect them to be for  Tetris.

In my opinion, this is a pretty decent Tetris clone that can be a great way to pass a couple of minutes (or an hour if you’re really into Tetris). The developer, svenn of Wololo /talk forums, seems to still be updating the GitHub branch so hopefully, we’ll see more features in this already decent homebrew game.

How do I get it?

To download it, you just need to follow the link below, download and install the VPK via VitaShell. The homebrew is also available on VitaDB but it’s an older version that doesn’t have the better UI, the upcoming piece box and other features. If you have any issues, contact Svenn on GitHub or Wololo /talk forums.

Download link (get this until the VitaDB version gets updated) : https://github.com/svennd/vita-tetromino/releases/tag/0.5

Wololo /talk forum link (don’t be too hard on yourself in the Features section, it’s a great homebrew!): http://wololo.net/talk/viewtopic.php?f=116&t=48591

Originally, the game was called “Tetronimo” but it was quickly renamed to “Tetromino”, which in my opinion sounds better! The Start image on the LiveArea bubble still needs to be changed.

The post Tetromino for the PSVita released – Play Tetris on your Vita with style! appeared first on Wololo.net.

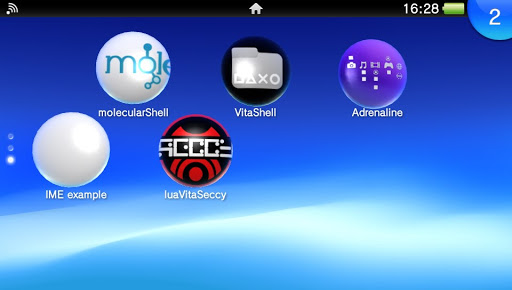
Release: luaVitaSeccy (Session ID calculator for Phantasy Star Online Games)

$
0
0

Vita homebrew dev Clem has sent us a new homebrew App for the PSVita, luaVitaSeccy. In the developer’s words:

What’s luaVitaSeccy ?

LuaVitaSeccy is a “Section ID” calculator for “legacy” Phantasy Star Online games, namely PSO games that came out before “Blue Burst”. Section ID’s change what drop table enemies have and other minor aspect of those games.
It is meant as a companion app, when you want to create a character and have a certain Section ID.

Usage:
  • Enter your character name using the On Screen Keyboard
  •  … And you’ll be presented with your Section ID
  • Push Triangle to exit app

Download LuaVitaSeccy

(vpk and source) :
Who am I ?
My name is Clem, I’m a completely new to developing homebrew, this app aims to be a port of Seccy which targets Android ( See Github: https://github.com/eleriaqueen/Seccy )
Why lpp-vita ?
I tried developing for VitaSDK and Vita2D but failed miserably. Rinnegatamante is awesome, his LUA interpreter gives even small-scale programming-hobbyists a chance !

The post Release: luaVitaSeccy (Session ID calculator for Phantasy Star Online Games) appeared first on Wololo.net.

NoAVLS released for the PSVita – Say goodbye to AVLS.. forever!

$
0
0

Sony has always liked forcing ‘features’ on users such as the forced blacklist on the PSTV and AVLS on some PSVita models. Now, thanks to taiHEN plugin NoAVLS, you can get rid of AVLS once and for all!


What’s AVLS and what does NoAVLS do?

AVLS, which means Automatic Volume Limiter System, is a limit that is enforced on your headphones to stop them from exceeding a specified volume level (21 bars to be exact). While this is meant to protect you from permanent ear damage, it can be a nuisance when it doesn’t work correctly since some headphones require a higher volume than others since the ‘safe’ levels are too quiet for them.

NoAVLS - Disable AVLS forever!

The AVLS option in ‘Sound & Display’. Disabled on my device as it doesn’t have the forced AVLS ‘feature’

NoAVLS is here to save you the headache of having to disable AVLS every 20 hours or when you reboot your system on AVLS-enabled Vita models. The affected models are:

  • Later European PSVita Fat (1000) models with a Wolfson Microelectronics WM1804E.
  • All European PSVita Slim (2000) models as they have the audio DAC chip mentioned above.

Do note that ‘AVLS’ will still be enabled in settings with this plugin. This is normal behaviour and AVLS still gets bypassed.

How do I install it?

The pesky audio DAC chip that does the difference!

Installing it is pretty easy and can be done by following these steps:

  1. Download “noavls.skprx” from the link below.
  2. Copy it to your Vita via FTP/USB into your tai folder.
  3. Add the “noavls.skprx” file to your *KERNEL section (as it’s an skprx plugin) in taiHEN’s config.txt. Common directories are “ux0:tai/noavls.skprx” or “ur0:tai/noavls.skprx” depending on where you store your taiHEN files.
  4. Reboot your Vita and enjoy!

If you have any issues report them to SilicaAndPina or dots-tb on the GitHub link below. SilicaAndPina, I hear you say? Don’t worry, this won’t format your Vita memory card (or ux0 partition) or potentially brick your Vita. You may look at the source code as it’s open source and compile the skprx yourself if you’re still skeptic. The developer/RE guy is @dots-tb and the project manager is SilicaAndPina.

NoAVLS 0.1 download: https://github.com/SilicaAndPina/NoAVLS/releases/tag/v0.1

NoAVLS readme: https://github.com/SilicaAndPina/NoAVLS/blob/master/README.md

A good explanation about the whole AVLS thing on the Vita: https://gbatemp.net/threads/permanently-disable-avls-with-homebrew.440254/

The post NoAVLS released for the PSVita – Say goodbye to AVLS.. forever! appeared first on Wololo.net.

Zelda3T/ Zelda: Time To Triumph port for the PSVita/PSTV released!

$
0
0

Thanks to HENkaku, the Vita’s gotten quite a few ports of open-source games and Zelda fan games are no exception! Through Wololo /talk user”usineur”, who’s also ported ZeldaROTH, we now have a port of ‘The Legend of Zelda: Time To Triumph’.


What’s Zelda: Time to Triumph?

Like Zelda: Oni Link’s Begins (ZeldaOLB) and Zelda: Return of Hylian (ZeldaROTH), Zelda: Time To Triumph is another fan-made Zelda game that got ported to the PSVita.

The game takes part after the events of Zelda: A Link to the Past (the SNES game) which is after Link killed his alter-ego. Ganon seems to want to take over Hyrule and finally an event came up to put his waiting to an end.

This is the third game in Vincent Jouillat’s Zelda fanmade trilogy.

Zelda3T in-game

If you’re a fan of SNES-esque Zelda games, this is a game you should surely check out (after you check the SNES/GBA offerings of the game on your Vita). Controls can be found in the link below and you can also pop them up while playing the game by pushing ‘SELECT’ on your Vita.

How do I install it?

As this is quite a big game, it requires data files so you have to install those as well as the VPK.

To install the game, you need to do the following:

  • Download the VPK and the data files from the link below.
  • Copy the VPK to your Vita and install it via VitaShell.
  • Extract the ‘z3t.zip’ data file to your computer and copy it over to ‘ux0:/data’. The data file is about 223MB large so make sure you have enough space on your Vita/PSTV.

Recounting some of the game’s story

That’s it, now you can play Zelda3T all you want. If you have any issues, report them to “usineur” on Wololo /talk forums or GitHub in the issues section.

Credits go to Vincent Jouillat for the game itself, Nop90 for his 3D port which includes many memory leak fixes that made their way into this port and littlebalup for inspiration on the control scheme. Ultimately, the person who ported the game to the Vita is “usineur” so all requests/bug reports regarding the game should be directed at him.

Zelda: Time to Triumph readme (+ more info + download links + control scheme): https://github.com/usineur/Zelda3T/blob/vita/README.md

Official game website: http://www.zeldaroth.fr/us/z3t.php

Wololo /talk thread: http://wololo.net/talk/viewtopic.php?f=116&t=48604

The post Zelda3T/ Zelda: Time To Triumph port for the PSVita/PSTV released! appeared first on Wololo.net.

USBHostFS for the PSVita released – Access your PC’s files via USB directly on your Vita!

$
0
0

In the PSP days, plugins were widespread and slowly, some of its plugins are being ported over to the Vita! This time around, USBHostFS got ported over to the Vita by Cpasjuste (who ported pfba over to the Vita among other things).


What’s USBHostFS?

As the name suggests, it lets you access the data of the computer (host) you’re connecting your PSVita to. This a port of the plugin of the same name that was available for the PSP. With this plugin, you can access specific directories (you can change which directory you access) and also copy files to/from (installing VPKs also worked) them by using any programs that support host0. This could prove useful,for example if you have a large folder of ROMs and want to browse them to copy over specific ones to your Vita, among other things.

Accessing files on my computer thanks to VitaShell and USBHostFS!

In my testing, I noticed a few issues with the plugin:

  • If this plugin is installed, you can’t use VitaShell’s USB functionality (to copy files to your Vita from your PC)
  • VitaShell quit on me when I tried to open a JPG file stored on my computer but I was able to open it just fine after copying it over to my Vita (ux0).
  • ‘usbhostfs_pc.exe’ didn’t work when I put it in the root directory of my hard drive (C:\)

Do keep in mind that this is the first release and according to the Cpasjuste, host0 support was only implemented in VitaShell version 1.75 (the current version of

VitaShell) so bugs are bound to be present.

How do I install it?

The expected error message I got when I tried using VitaShell’s USB functionality

Installation is somewhat simple if you’re a little knowledgeable on how to install drivers on Windows:

  • Copy the “usbhostfs.skprx” to ux0:/tai or ur0:/tai.
  • Add the plugin to KERNEL section of taiHEN’s config.txt (example directories are “ux0:/tai/usbhostfs.skprx” and “ur0:/tai/usbhostfs.skprx”).
  • Reboot your Vita and connect it to your computer.
  • Go into device manager and double-click the ‘unknown device’/’PSVita’ entry.
  • Move to the ‘Driver’ tab, click ‘Update Driver’ and point it to where you extracted the driver.
  • The driver is unsigned so Windows will complain about it, you can safely tell Windows that the driver is fine. On Windows 10, you have to disable driver signature verification.
  • Open the ‘usbhostfs_pc.exe’ file on your computer. (The directory shared will be where the ‘usbhostfs_pc.exe’ is found)
  • Start VitaShell on your PSVita and profit!

    The PSVita in device manager with the plugin installed before installing the proper driver

The driver, SKPRX file (the plugin itself) and the ‘usbhostfs_pc.exe’ are all provided in the download link below!

If you find any bugs, report them to Cpasjuste on GitHub in the issues tab. The driver is available for both 32-bit and 64-bit versions of Windows (I tried it under Windows 7 SP1 64-bit) and there’s a compiled 64-bit Linux client as well in the archive.

Readme of USBHostFS (read it before you actually use the plugin): https://github.com/Cpasjuste/usbhostfs/blob/master/README.MD

USBHostFS 1.0 download link: https://github.com/Cpasjuste/usbhostfs/releases/tag/8f6c5e8


The post USBHostFS for the PSVita released – Access your PC’s files via USB directly on your Vita! appeared first on Wololo.net.

Viewing all 1422 articles
Browse latest View live